9/06/2010

Krispy Apple Treats

It's time for some fun School Snacks! How about these adorable little Rice Krispy Apple Treats?
Little C and I made these after school one day to share with her school class, they were a hit! She did a great job!

Speaking of those kiddos in the kitchen, I just added the "Featured Little Foodie" of the week to my sidebar! If you have a cooking pic of your kids/neices/nephews/grandkids/neighbors and want to be featured, email me your photos and we'll let those Little Foodies have the spotlight! (If you have a blog, we'll also link to you). I also have a secret for making your Rice Krispy Treats hold together a little better and also giving them a yummy color/flavor! Jell-o!! Add a small package to your batch after you melt the marshmallows. You will LOVE IT! I can't wait to make orang-ey pumpkins for Halloween!
I guess it's not a secret anymore...

Krispy Apple Treats
Makes 25
Ingredients:
6 C. Krispy Rice Cereal
1 pkg. large marshmallows
3 T. butter
1 small pkg. Jell-o powder, cherry or strawberry flavor
25 small Tootsie Roll Candies
Royal Icing, tinted green
Baking spray
Wax Paper
Red Food Coloring, optional
optional: you could use fruit roll-ups or those green mint leaf candies instead of the royal icing.

Directions:
Place marshmallows and butter in large microwave-safe bowl. Microwave on high for 2 minutes. Stir and microwave for an additional minute. Remove from microwave and stir in jell-o powder. If desired, you can add a few drops of red food coloring (depending on how "red" your jell-o is). Add Krispy Rice cereal and stir well. Spray hands with baking spray and roll mixture into balls (a little larger than a golf ball) and drop on wax paper. After balls have set for a few minutes, use your thumb to press into the top to make an "apple" shape.
Add a small tootsie roll "stem" and using royal icing (or any green candy), pipe on a "leaf". I actually would have rather used some kind of green candy but didn't have any on hand. I just used royal icing and a leaf-shaped icing tip.
Serve to your favorite kiddos! These would also be a really fun "Teacher Appreciation Day" snack!

8/31/2010

Beyond Everyday Cookies

Before we get to my favorite new recipe from Baking With Betty, I have to tell you about Lake Minnetonka! The evening boat ride was a definite highlight of the trip.

Sailing around lake and seeing all the gorgeous mansions and beautiful landscapes, made me feel a little homesick for the Midwest. After being in Phoenix for many years, I had forgotten how lush and green summers are for everyone else. If you ever visit Minneapolis do not miss a chance at seeing Lake Minnetonka!

So on to my favorite from “Beyond Everyday Cookies”…
Cranberry-Macadamia Bars!
And yes, they are as good as they look in the picture! Cranberry Macadamia Bars from Betty Crocker
1 pouch Betty Crocker® sugar cookie mix
1/3 cup butter or margarine, melted
1 egg
1/3 cup butter or margarine
1/4 cup packed brown sugar
1 cup sweetened dried cranberries
1 cup macadamia nuts, coarsely chopped
1/2 cup white vanilla baking chips
1 teaspoon oil

1. Blend cookie mix, 1/3 cup butter and egg until soft dough forms. Press dough in bottom of greased 9-inch square pan. Bake at 350°F 15 minutes.
2. Heat 1/3 cup butter, brown sugar and cranberries over medium heat, stirring constantly, until mixture comes to a boil. Spoon and spread cranberry mixture evenly over partially baked cookie base. Sprinkle with nuts. Bake 10 to 15 minutes or until light golden brown. Cool completely.
3. In resealable freezer plastic bag, mix baking chips and oil; seal bag. Microwave on High 30 to 45 seconds, squeezing mixture in bag every 15 seconds until smooth. Cut 1/4-inch top from corner of bag; drizzle over bars.
Makes 40 bars


A close second is the Crème Brûlée Cheesecake Bars. Both use a Betty Crocker sugar cookie mix for the crust. This, of course, was much easier and quicker than making a crust from scratch. I often over bake my crusts when I’m making bar cookies, but I am sold on using the cookie mix now. The crusts were firm, but still chewy and moist. I was really impressed. There are tons of recipes for all kinds of cookies on the Betty Crocker site.
Crème Brûlée Cheesecake Bars from Betty Crocker
1 pouch (1 lb 1.5 oz) Betty Crocker® sugar cookie mix
1 box (4-serving size) French vanilla instant pudding and pie filling mix
2 tablespoons packed brown sugar
1/2 cup butter or margarine, melted
2 1/2 teaspoons vanilla
2 eggs plus 3 egg yolks
2 packages (8 oz each) cream cheese, softened
1/2 cup sour cream
1/2 cup sugar
2/3 cup toffee bits, finely crushed

1. Heat oven to 350°F. Lightly spray bottom and sides of 13x9-inch pan with cooking spray. In large bowl, stir cookie mix, pudding mix, brown sugar, melted butter, 1 teaspoon of the vanilla and 1 whole egg until soft dough forms. Press dough in bottom and 1/2 inch up sides of pan.
2. In small bowl, beat cream cheese, sour cream and sugar with electric mixer on medium speed until smooth. Add remaining whole egg, 3 egg yolks and remaining 1 1/2 teapoons vanilla; beat until smooth. Spread over crust in pan.
3. Bake 30 to 35 minutes or until set in center. Immediately sprinkle top with crushed toffee bits. Cool 30 minutes. Refrigerate about 3 hours or until chilled. For bars, cut into 9 rows by 4 rows. Store covered in refrigerator.
Makes 36 bars

My favorites appear to be the favorites of others, too! They were disappearing fast!
Sherri, from Betty Crocker, shared lots of fun tips and recipe ideas for cookies.
Other tempting & tasty favorite were:
Red Velvet Rich & Creamy Cookies
Citrus-Kissed Fig Thumpbrints
(perfect for the Holidays coming up!!)
Mandy is busy making some cute "school snacks" so stay tuned for more fun this week!

8/30/2010

All You Need is Bisquick!

Hello! It’s Gourmet Sister here to tell all about the Baking with Betty Event at the General Mills Headquarters. Mandy was unable to go to Minneapolis, so I happily went in her stead. The whole trip from the Dinner Cruise to the Baking Party was amazing, and I had a wonderful time. Everyone there was gracious and happy to share tips, and of course, recipes!

My first session was "It's All about Breakfast", featuring easy and quick recipes using Bisquick.

I was feeling a little daunted since I never use Bisquick. My family is on a budget and we have allergies so we don’t usually buy many packaged foods. But, the Fresh Lemon Cream Crepes recipe has changed my mind about Bisquick. Tonight I tried it out on my “meat and potatoes” family. It was a huge success. My in-laws are coming over tomorrow, so I’m making ahead, a platter of crepes for dessert. I was impressed with how quick and delicious this dish was! There are tons of Bisquick recipes on the Betty Crocker website that have moved way past pancakes.
Here's Julie from Joy's Hope proudly displaying the crepes...yummy!Fresh Lemon Cream Crepes
Makes 10
Crepes Ingredients:
½ C. Bisquick mix
1 TB sugar
½ C. milk
1 TB melted butter
2 eggs

Filling Ingredients:
2 C. sour cream
½ C. milk
1 TB grated lemon peel
¼ C. fresh lemon juice
1 box (4-serving size) vanilla instant pudding and pie filling
2 C. fresh raspberries

1. In small bowl, beat Bisquick mix, sugar, ½ cup milk, the melted butter and eggs with whisk or fork until blended. Grease 6- or 7-inch nonstick skillet with shortening; heat over medium heat until bubbly. For each crepe, pour 2 tablespoons batter into skillet; immediately rotate skillet until batter covers bottom. Cook until golden brown on bottom side. Run wide spatula around edge to loosen; turn and cook other side until golden brown. Stack crepes as you remove them from skillet, placing waxed paper between each; keep covered.

2. In small bowl, beat sour cream, ½ cup milk, the lemon peel, lemon juice and pudding mix with whisk or fork until blended.

3. To assemble each crepe, spoon about ¼ cup of the filling on one end of crepe; top with 5 raspberries. Roll up; sprinkle each crepe with powdered sugar. Serve with additional raspberries.

We also got to make so many other delicious recipes using Bisquick, many aren't on the website yet, so you can be the first to try them out!

Apple Oven Pancake

(click image to enlarge)

If any of you would like to link up your Baking With Betty posts, we'd love to read what your favorite recipes from the day were! You can link up below:

8/28/2010

Apple Teacher Baskets

This year we made easy and cute baskets for the girls' teachers with my contact info and just a little blurb about our child (this is an especially great idea if you have a child with allergies, etc.!)
I was inspired by these adorable caramel apple boxes that I found on vacation! You can check your local cake/candy supply store, I also found some online here.
In the baskets, we placed a Bath & Body Works Apple Hand Sanitizer, a little pack of these SUPER CUTE (& free!) printable cards from Posh Pixels Studio, and a Caramel Apple.
I'm sure you've all made caramel apples before, so I won't insult your intelligence! I will say that I love Peters Caramel Loaf--it is SO GOOD for any candy and especially apples. After the apples are dipped in caramel and have set up on wax paper, we like to add...
CHOCOLATE AND SPRINKLES!
(in our school colors, of course!)
You can entirely dip the apple in chocolate...
or just add some fancy drizzles...
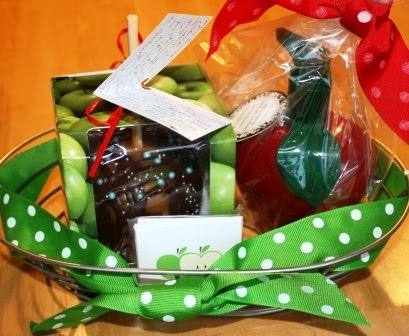
All ready to be boxed up and sent off to school!
The girls loved this easy project (and so did I!).
I'd love to hear any back-to-school traditions you have! Are you ready/excited for school?

8/23/2010

Masterbuilt Smoker Giveaway

Since we're new in town, I'm planning on throwing a Labor Day Bash and getting to know some of our neighbors. Do you think they'll be enticed by the smell of smoking meat? I hope so! This new toy arrived today!What?! You want to smoke some food for Labor Day, too? Well guess what? I'm excited to tell you that we're giving one away! (If you have a man, this could get you some major brownie points! If you don't have a man, smoke up a turkey or ham and they'll come runnin'! ;))
Check out this demo video and try not to drool on your keyboard...


The folks at Masterbuilt were nice enough to provide an Electric Digital Smoker for a Gourmet Mom-on-the-Go reader!
Details:
Masterbuilt Electric Digital Smoker
• 30" and priced at $299
• Viewing window and internal light
• Push-button digital time temperature & time control panel
• Thermostat controlled temperature
• Chrome-coated smoking racks
• Convenient side wood-chip loader
• Removable drip pan and rear-mounted grease pan


Not only does Masterbuilt have great products, they have a fantastic recipes for you to use! What a great cooking resource!


To Enter:
Go to the
Masterbuilt Recipe Page and leave a comment here telling me what you'd like to try! So easy!


Time's up! We have a winner!
Amy, please contact me within 48 hours to claim your prize. Otherwise we'll pick a new winner to have some Labor Day smokin' fun. :)
I've had several people ask where they can buy one (Christmas is coming:)), you can get a list of your local retailers here.
Disclosure: I was given the product to review and one to give away. I was not compensated for this post. All opinions, as always are my own.

8/18/2010

Celebration Sandwich

What reasons have you had to celebrate recently? A new job? Birthday? Anniversary? Just a great day?
At our house, we have a new Kindergartener!
So, I made her a special lunch to celebrate the first day of school...
This easy sandwich would also be so cute sent to school for a birthday lunch!
Celebration Sandwich "Cake"
Ingredients:
6 slices bread
your favorite sandwich fillings
1 pretzel rod
1 yellow starburst candy
1/2 orange starburst candy
shredded carrots (or whatever you want to use for garnish)
Cups or circle cutters of various sizes
Directions:
Make sandwiches. Find cups, lids, or cutters of 3 different circle sizes & cut out sandwiches.
Microwave one yellow and 1/2 orange starburst candies for about 7 seconds to soften. Place orange candy on top of yellow, smash together and form a "candle flame" shape. Push onto the top of a pretzel rod.
Stack sandwiches with the largest one on the bottom and press pretzel rod "candle" through the sandwiches (you can cut the pretzel if it's too long). Serve with shredded carrots or any other fresh fruits & veggies. CELEBRATE!!:) We don't like to be wasteful, so I served the extra sandwich "scraps" on a little plate on the side.
Congratulations, Big Girl! We are proud of you!

8/16/2010

Food Adventure Passport

Hi Everyone! We're back from vacation and we have lots of fun coming your way this Fall!
The start of the school year is a time for new things so why not incorporate that into your family's mealtime?
How about a little Food Adventure?
I have something fun for your family to try! I made up some Food Adventure Passports that you can download and print here. Simply print the cover, add some plain paper, fold in half and staple.

As you try new foods, your kids can write about them, draw them, put in photos, write about the country it's from, whatever you want! It's also a great conversation-starter for dinnertime.
Looking for an idea for dinner tonight? Here's a video of me showing you how to make an Easy Cheesey Swiss Potato Pancake.
Be warned: there's yodeling involved....

This week on Real Women of Philadelphia, I'm hosting an International Side Dish Challenge. You can go here to join in on the fun and your recipe could win $500!

Holiday Playlist

My grandmother hasn't been doing well...to cheer her up, I rounded up a few of my musical friends and made an album of Holiday songs fo...